Bringing home a baby can be an exciting and magical time. For some mamas, however, it can be scary and overwhelming.
If you search for tips and tricks on how to have an easier hospital-to-home transition for baby, you’ll find a ton of great info from pediatricians, sleep experts, and lactation consultants.
I’m going to leave baby care up to the experts, lord knows I am still trying to figure it out and my kids are 5 and 7. But what I am an expert in is this: helping Mothers heal better, quicker, and more comprehensively after having a baby.
It’s time to put Mamas first, and these tips are all for you. So dig in, start prepping, and share this with a friend who may need it. Here’s your brief guide to the first 14 days postpartum.
See Also

Postpartum Power
Day 1: Rest and Replenish
Congrats! Baby is Here! You’re probably exhausted, hungry, full of joy and love, and/or relieved it’s over, or even missing being pregnant. All the feels are normal. Today just rest and replenish.
You just went through a marathon. Your body needs fuel, calories, and hydration. Try to drink as much as you can, you’re going to need all the fluids you can get once your milk starts to come in.
You’ve also lost blood and a major organ (hello placenta!). Nourish with warm fluids like bone broth, calorie-dense foods, and veggies/fruit to help with that first poop. Rest and replenish, Mama. Your body needs it.
Day 2: Ice and Elevate
You’re probably feeling a bit sore down there, am I right? This also goes for c-section Mamas—you just went through a major abdominal and/or vaginal trauma!
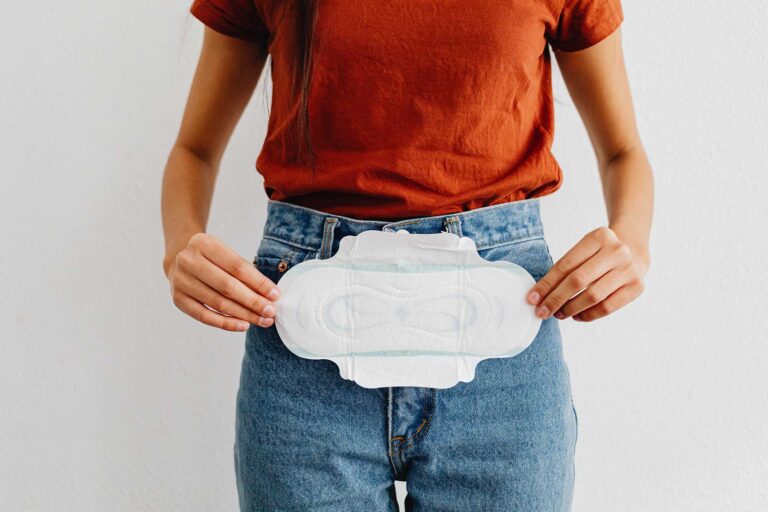
Many hospitals provide ice packs and pads altogether. Use them! Keep ice on the perineum/vulva for about 10-15 minutes at a time, and do so frequently throughout the day.
You can also stick a pillow under your hips to elevate them while you’re resting. This helps with swelling and with pain. Both of these tips are great to do in the hospital AND at home.
Day 3: Squat, Splint, and Squeeze
I hope that you have pooped by now, but if you haven’t don’t fear. Here are a couple things to help you poop more successfully and with less pain:
Adopt a squatting posture
You can get a footstool, squatty potty, or even just flip over the trash can to support your feet. You want to get your knees higher than your hips and lean forward, just like you are squatting over a hole in the ground.
Splint the tender perineum
Second, place the pads of your fingers or a warm washcloth over the perineum or any stitches, and just gently apply pressure. You can also do this with folded toilet paper. This helps support and protect that sensitive tissue and fresh sutures as poop has to pass through it. Try not to hold your breath or push super hard.
Use a peri bottle with warm water for cleaning
A peri bottle, I recommend FridaMom , is a less abrasive and more comfortable way to help clean up after using the bathroom. Scratchy toilet paper doesn’t feel good on that newly postpartum tissue. Dab dry with a soft cloth, spray some cooling spray or dermaplast, add a fresh pad and ice pack, and get back to the bed or couch!
Day 4: Log Rolls and Foundation
Now that you’re starting to move around a bit more, it’s important to start to properly support your body during daily movements and tasks.
Your body just went through something amazing and very straining—and I’m not just talking about the birth. Pregnancy puts a tremendous load on your body, and your body needs some gentle reminders on how to move and heal.
If you’ve ever sprained your ankle or broken a bone, you know it takes some time to re-learn how to move it and regain functionality. It’s the same for your post-baby body.
The best way to start the process is by turning on what I call your “foundation” and using it before you get out of bed (since you’re getting up all the time!!).
Here’s how to turn on your foundation:
- Gently lift and squeeze your pelvic floor (aka the vaginal muscles) like you’re picking up a blueberry with your vagina
- Draw in your belly, bringing your ribs down as you exhale
- Take notice of how you’ve just engaged your core
This starts to help connect your brain to your body and helps support you as you are healing. You can apply this before performing pretty much any movement you’re doing frequently.
For example, when you’re getting out of bed try the log roll. Turn on your foundation while you’re laying down, draw your knees up, turn to your side, swing your legs off the bed and push yourself up with your arms. Voila! Starting to engage your foundation and support your abdomen and pelvic organs on day 4! You go girl!
Check out my free training, 3 Postpartum Recovery Tips for Your First 6 Weeks, for a more in-depth explanation on how to re-establish motor control and movement of your pelvic floor muscles.
Day 5: Ditch the Mesh
As glamorous as the hospital mesh undies are, it’s time to switch over to something a bit more comfortable.
Saalt makes an amazing postpartum bundle! Their undies are period and pee-proof, so soft, re-usable, way comfier than adult diapers, and actually pretty cute. These can be worn under compression garments, and you don’t have to wear a bulky pad.
If Saalt isn’t your cup of tea, you can try ModiBodi or adult diapers if you want something disposable.
Make sure you keep icing though!!
Day 6: Compression
We need to start thinking about birth as an athletic and challenging event—because it is. And after we complete an athletic and challenging event, especially if there was an injury (think perineal tearing, stitches, etc) what do we usually do in the early stages?
There is an acronym you’re probably familiar with. RICE stands for rest, ice, compression, and elevation. We’ve already got the rest, elevation, and ice part down, so now it’s time for compression.
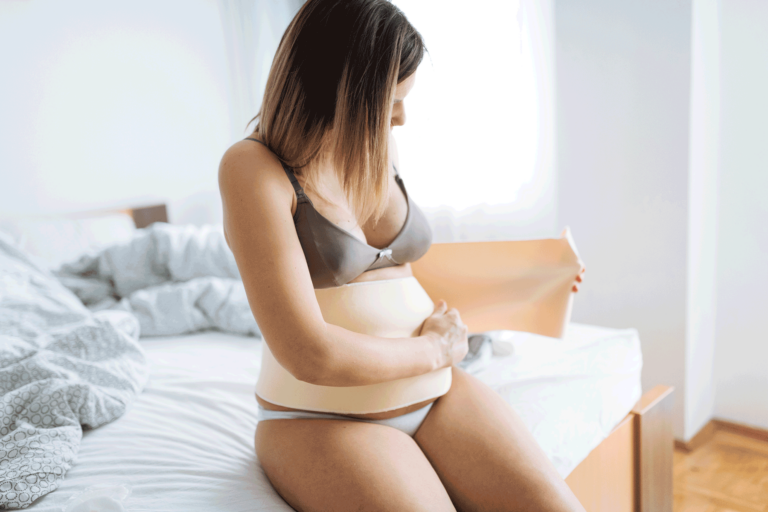
I am not talking about abdominal binders that squeeze you like a tube of toothpaste. I am specifically talking about medical-grade postpartum recovery garments that offer a graded compression upwards. The upward compression is better for your pelvic floor, abdomen, and body as a whole. These types of compression garments usually come in leggings or shorts, which are much more comfortable and user-friendly than a corset-style binder.
Compression helps decrease swelling, promotes healing, and in this case, offers external support to sensitive tissue. I recommend SRC health for all your postpartum compression needs, and they have a ton of options to choose from.
Click here to shop SRC Health, and use code #Marcy_Crouch
Day 7: Walk it Out
As a physical therapist, I am BIG proponent of movement over bedrest (of course there are situations where bed rest is necessary, always consult your doctor).
Early mobility has been shown to help with healing, decrease the risk of DVTs or blood clots, encourage digestion, help with constipation, and improve mental health (sunshine and fresh air). Honestly, even just a change of scenery from the house can be so nice.
A good rule of thumb is to walk around the bedroom, then the house, then the yard, then the street. Take it easy, you don’t need to be running around yet.
Day 8: Functional Kegels
We are taking the Log roll and Foundation to the next step on Day 8. I’m sure you have been told that Kegels are the answer to everything, and to do all of them all the time…but I’m here to tell you that doing hundreds of Kegels a day while you are just sitting in your car or watching TV is bogus.
The pelvic floor needs to be strong AND coordinated to support you and your organs while you are moving around and living your life. We don’t experience pelvic floor dysfunction when we’re sitting, it’s while we’re doing daily activities like bending over or picking up a baby!
Instead of just doing Kegels at a red light, add them into 2 things you do every day. For example, every time you get up to feed the baby, or bend over to lift up the car seat, turn on your Foundation. Start to teach your pelvic floor to come on when it’s needed the most: not just while sitting down.
Day 9: Virtual Wellness Session
This is the perfect time to set up your Virtual Wellness Session with an expert provider (like someone from The Down There Doc team). You’ll be a bit more rested, and will have a good idea of what you need to be doing around your home and what is difficult for you.
During a Virtual Session, your provider can answer any questions you have about your recovery, give you posture tips and education on feeding and lifting, help fit you into your postpartum garments, discuss baby carriers and how to use them, and help you jumpstart your recovery.
This is a great way to have a provider see you in your own space, and make sure you have what you need. Click here to schedule.
Day 10: Bowel Movement Pain Relief
Time for a bowel movement check-In. How’s it going? Hopefully, by now, you’re having daily bowel movements that don’t make you want to cry, but no fear if they are still painful and difficult.
Make sure you are doing everything I mentioned on Day 3. Continue doing the perineal splint to protect the area. If you’re still experiencing a lot of discomfort with pooping, you may need some hemorrhoid cream or witch hazel pads for relief.
Day 11: Slow and Easy Movement
Let’s progress that walking program! Remember to continue taking it easy and slow—you don’t need to be running around the house or walking long distances.
If you’re feeling up to it try getting outside, on a treadmill, or an indoor space if its winter to try walking a bit longer, and a bit farther than you did last week. Take frequent breaks, drink plenty of water, and either push the stroller or wear the baby so you can be centered and stable.
Leave the heavy diaper bag at home, no need to be carrying that on your walk.
Day 12: Social Support
Finding a social support group is one of the best things you can do as a new mom or parent. For me personally, after the birth of my first son, joining a Mom’s group was a lifesaver. Find a group you connect with, either in person or virtually, and I guarantee you will make great friends, laugh, cry, and not feel so alone.
Here are a few places you can check:
- Facebook – There are TONS of facebook groups and communities for new moms, search out one in your area
- Hospital – Check with you hospital or Doctor for free resources, if they haven’t already provided them. Some hospitals offer free lactation classes or gatherings for moms.
- Your Local Library – It may be too soon for this, but some local libraries even offer Baby & Me reading time.
- Down There Done Right – My online postpartum recovery program comes with a built-in community of moms in every stage of their journey!
Day 13 – Questions for Your Provider
You’re almost 2 weeks post at this point! Your BABY is almost 2 weeks old, little peanut!
Start thinking about what questions you have for your doctor or midwife and jot them down in a journal or on your phone. It’s hard to remember everything when we get to that 6-week postpartum check-up, so as you think of things, write them down.
In my online program, Down There Done Right, I have an entire “Early Days” manual that includes my fave questions for your provider. This will help you stay on task and get all your questions answered.
Day 14 – Down There Done Right
Now that you’ve made it to the 2-week mark, you’ve had your virtual wellness session and you’re already ahead of the game for recovery. It’s time to get your postpartum recovery roadmap dialed in.
Enroll in Down There Down Right to jumpstart your recovery, connect with other moms, and improve pelvic floor health, strength, and overall function.
Our team holds regular LIVE Q&A’s and we bring in guest experts from the pregnancy, postpartum, and parenting space to give exclusive talks to our community. You get coaching, community, and best of all—you’ll have certainty in your postpartum recovery.


 thank you!

 Gift Your Fav Mom or Mom-To-Be